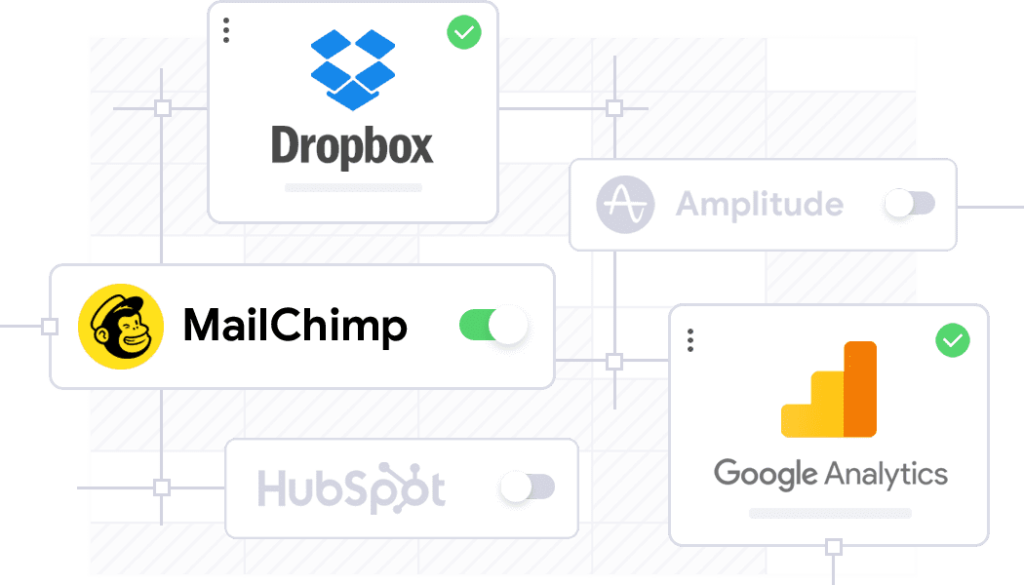
Alibaba
To track a new Alibaba Data Source in your OptScale account, please select the Alibaba Cloud tab at the Data Source Connection step during the initial configuration or later on in the Settings section of the main page.

Name
In the first field, you can specify any preferred name to be used for this Data Source in OptScale.
Alibaba Cloud Access key ID
The Cloud Access key ID is a unique string that is assigned to your RAM user.
Attention
Programmatic Access must be enabled for this user to support access through the API.
To find it:

Note
The Cloud Access key ID can also be found in the AccessKey.csv file downloaded from Alibaba during access key creation.
Access Secret
Secret access key for the RAM user can be found in the AccessKey.csv file downloaded from the console during access key creation. Information about the secret will not be accessible through the UI after it has been created.
(Optional) New RAM User Creation with Secret
Alternatively, you can create a separate user in your Alibaba cloud account for OptScale to operate with.
To do this:

- Provide a unique name for the new RAM user and enable Programmatic access by checking the corresponding box.
- Copy and save Access Key ID and Secret or download the AccessKey.csv file to your computer.

Required Policy
The account must have the following single permission to support OptScale: Read-only access to Alibaba Cloud services.
To add it:
- Click on the Add Permissions button to the right of your RAM user.
- Find ReadOnlyAccess in the list and click on it. It will appear in the Selected section.
- Click OK.

AWS#
OptScale supports the AWS Organizations service that allows linking several Data Sources in order to centrally manage data of multiple users while receiving all billing exports within a single invoice. The Root account (payer) will be the only one having access to collective data related to cloud spendings. When registering this type of profile in OptScale, the user is given an option for Data Exports to be detected automatically.
Warning
When you connect the root account but do not connect the linked accounts, all expenses from the unconnected linked accounts will be ignored, even if they exist in the data export file. To retrieve expenses from both linked and root accounts, connect all AWS accounts (not just the root). OptScale ignores data from unconnected linked accounts.
To track a new AWS Data Source in your OptScale account, please select the AWS Root Account tab at the Data Source Connection step during the initial configuration.

Automated import of billing data
Step 1. Having Data Exports configured for your cloud account is the main prerequisite in order to proceed with the remaining actions. If Data Export hasn’t been configured, refer to the Root Account – Data Export not configured yet section.
Step 2. Update bucket policy
- Navigate to the Permissions tab of your AWS S3 bucket and select Bucket Policy.
- Replace <bucket_name> with the name of the bucket.
- Replace <AWS account ID> with the AWS Account ID (12 digits without “-”):
{
"Version": "2012-10-17",
"Statement": [
{
"Sid": "EnableAWSDataExportsToWriteToS3AndCheckPolicy",
"Effect": "Allow",
"Principal": {
"Service": [
"billingreports.amazonaws.com",
"bcm-data-exports.amazonaws.com"
]
},
"Action": [
"s3:PutObject",
"s3:GetBucketPolicy"
],
"Resource": [
"arn:aws:s3:::<bucketname>/*",
"arn:aws:s3:::<bucketname>"
],
"Condition": {
"StringLike": {
"aws:SourceAccount": "<AWS account ID>",
"aws:SourceArn": [
"arn:aws:cur:us-east-1:<AWS account ID>:definition/*",
"arn:aws:bcm-data-exports:us-east-1:<AWS account ID>:export/*"
]
}
}
}
]
}

Step 3. Create user policy for read only access
- Go to Identity and Access Management (IAM) → Policies.
- Create a new user policy for read only access to the bucket (<bucket_name> must be replaced in policy):
{
"Version": "2012-10-17",
"Statement": [
{
"Sid": "ReportDefinition",
"Effect": "Allow",
"Action": [
"cur:DescribeReportDefinitions"
],
"Resource": "*"
},
{
"Sid": "GetObject",
"Effect": "Allow",
"Action": [
"s3:GetObject"
],
"Resource": "arn:aws:s3:::<bucket_name>/*"
},
{
"Sid": "BucketOperations",
"Effect": "Allow",
"Action": [
"s3:ListBucket",
"s3:GetBucketLocation"
],
"Resource": "arn:aws:s3:::<bucket_name>"
}
]
}


Step 4. Create user and grant policies
- Go to Identity and Access Management (IAM) → Users to create a new user.

- Attach the created policy to the user:

- Confirm creation of the user.
- Create access key for user (Identity and Access Management (IAM) → Users → Select the created user → Create access key):

- Download or copy Access key and Secret access key. Use these keys when connecting a Data Source in OptScale as the AWS Access Key ID and AWS Secret Access Key, respectively (at step 5).

Step 5. Create Data Source in OptScale
- Go to OptScale.
- Register as a new user.
- Log in as a registered user.
Create a Data Source.
- Provide user credentials (see screenshot above for more details): AWS Access key ID, AWS Secret access key.
- Select Export type: AWS Billing and Cost Management → Data Exports → Find the report configured earlier → Export type.
- Select Connect only to data in bucket.
Provide Data Export parameters:
- Export Name: AWS Billing and Cost Management → Data Exports table → Export name.
- Export S3 Bucket Name: AWS Billing and Cost Management → Data Exports table → S3 bucket.

Export path: AWS Billing and Cost Management → Data Exports table → Click on Export name → Edit → Data export storage settings → S3 destination → last folder name(without “/”)


- After creating a Data Source, you will need to wait for the export to be generated by AWS and uploaded to OptScale according to the schedule (performed on an hourly basis).
Discover resources
OptScale needs to have permissions configured in AWS for the user Data Source in order to correctly discover resources and display them under a respective section of the dashboard for the associated employee.
Make sure to include the following policy in order for OptScale to be able to parse EC2 resources data:
{
"Version": "2012-10-17",
"Statement": [
{
"Sid": "OptScaleOperations",
"Effect": "Allow",
"Action": [
"s3:GetBucketPublicAccessBlock",
"s3:GetBucketPolicyStatus",
"s3:GetBucketTagging",
"iam:GetAccessKeyLastUsed",
"cloudwatch:GetMetricStatistics",
"s3:GetBucketAcl",
"ec2:Describe*",
"s3:ListAllMyBuckets",
"iam:ListUsers",
"s3:GetBucketLocation",
"iam:GetLoginProfile",
"cur:DescribeReportDefinitions",
"iam:ListAccessKeys"
],
"Resource": "*"
}
]
}
Your AWS Data Source should now be ready for integration with OptScale! Please contact our Support Team at support@hystax.com if you have any questions regarding the described configuration flow.
OptScale supports the AWS Organizations service that allows linking several Data Sources in order to centrally manage data of multiple users while receiving all billing reports within a single invoice. The Root account (payer) will be the only one having access to collective data related to cloud spendings. When registering this type of profile in OptScale, the user is given an option for Data Exports to be created automatically.
Warning
When you connect the root account but do not connect the linked accounts, all expenses from the unconnected linked accounts will be ignored, even if they exist in the data export file. To retrieve expenses from both linked and root accounts, connect all AWS accounts (not just the root). OptScale ignores data from unconnected linked accounts.
To track a new AWS Data Source in your OptScale account, please select the AWS Root Account tab at the Data Source Connection step during the initial configuration.

Automated creation of billing bucket and Data Export
Step 1. Create user policy for bucket and export creation access.
- Go to Identity and Access Management (IAM) → Policies. Create a new policy for fully automatic configuration (both bucket and export are created) (<bucket_name> must be replaced in policy)
{
"Version": "2012-10-17",
"Statement": [
{
"Sid": "ReportDefinition",
"Effect": "Allow",
"Action": [
"cur:DescribeReportDefinitions",
"cur:PutReportDefinition"
],
"Resource": "*"
},
{
"Sid": "CreateCurExportsInDataExports",
"Effect": "Allow",
"Action": [
"bcm-data-exports:ListExports",
"bcm-data-exports:GetExport",
"bcm-data-exports:CreateExport"
],
"Resource": "*"
},
{
"Sid": "CreateBucket",
"Effect": "Allow",
"Action": [
"s3:CreateBucket"
],
"Resource": "*"
},
{
"Sid": "GetObject",
"Effect": "Allow",
"Action": [
"s3:GetObject"
],
"Resource": "arn:aws:s3:::<bucket_name>/*"
},
{
"Sid": "BucketOperations",
"Effect": "Allow",
"Action": [
"s3:PutBucketPolicy",
"s3:ListBucket",
"s3:GetBucketLocation"
],
"Resource": "arn:aws:s3:::<bucket_name>"
}
]
}

Step 2. Create user and grant policies
Go to Identity and Access Management (IAM) → Users to create a new user.

Attach the created policy to the user:

Confirm creation of the user.
Create access key for user (Identity and Access Management (IAM) → Users → Created user → Create access key):

Download or copy the Access key and Secret access key. Use these credentials when creating a Data Source connection in OptScale.

Enter the Access key into the AWS Access Key ID field and the Secret access key into the AWS Secret Access Key field (at step 3).
Step 3. Create Data Source in OptScale:

Note
Specify the bucket in the “Export S3 Bucket Name” field if it already exists. OptScale will then create the report and store it in the bucket using the specified prefix.
- After creating a Data Source, you will need to wait for AWS to generate the export and upload it to OptScale according to the schedule (approximately one day).
Warning
AWS updates or creates a new export file once a day. If the export file is not placed in the specified bucket under the specified prefix, the export will fail with an error.

Discover Resources
OptScale needs to have permissions configured in AWS for the user Data Source in order to correctly discover resources and display them under a respective section of the dashboard for the associated employee.
Make sure to include the following policy in order for OptScale to be able to parse EC2 resources data:
{
"Version": "2012-10-17",
"Statement": [
{
"Sid": "OptScaleOperations",
"Effect": "Allow",
"Action": [
"s3:GetBucketPublicAccessBlock",
"s3:GetBucketPolicyStatus",
"s3:GetBucketTagging",
"iam:GetAccessKeyLastUsed",
"cloudwatch:GetMetricStatistics",
"s3:GetBucketAcl",
"ec2:Describe*",
"s3:ListAllMyBuckets",
"iam:ListUsers",
"s3:GetBucketLocation",
"iam:GetLoginProfile",
"cur:DescribeReportDefinitions",
"iam:ListAccessKeys"
],
"Resource": "*"
}
]
}
Your AWS Data Source should now be ready for integration with OptScale! Please contact our Support Team at support@hystax.com if you have any questions regarding the described configuration flow.
Create Data Export
Note
Creating a Data Export is only available for the Root cloud account (payer), while all its Linked accounts will be centrally managed and receive their billing data through the main account’s invoice.
In order to utilize automatic / manual billing data import in OptScale, first, you need to create a Data Export in AWS. Please refer to their official documentation to become acquainted with the guidelines for Data Exports.
Standard
Step 1. Export type
- Select Standard data export export type.
Step 2. Export name
Step 3. Data table content settings:
Step 4. Data export delivery options:
Step 5. Data export storage setting:
Step 6. Review
- Confirm export creation. Data Export will be prepared by AWS during 24 hours.
Legacy CUR Export
Step 1. Export type
- Select Legacy CUR export (CUR) export type.
Step 2. Export name
Step 3. Export content
- Select Include resource IDs and Refresh automatically checkboxes.
Step 4. Data export delivery options:
Step 5: Data export storage setting:
Step 6. Review
- Confirm export creation. Data Export will be prepared by AWS during 24 hours.
When it’s done, follow the steps from the section Root account – Data Export already configured
Linked
OptScale supports the AWS Organizations service that allows linking several Data Sources in order to centrally manage data of multiple users while receiving all billing exports within a single invoice.
Selecting a AWS Linked tab will make the registration flow easier eliminating the option to input bucket information for billing purposes since this will be received through the root account, whose user will then be able to distribute periodic reports individually if intended by the company management. In this case, only Access key and Secret access key are required.

Note
If you only specify a AWS Linked account without providing credentials for the main one, OptScale will not be able to import any billing data.
Use Connect to create a Data Source in OptScale. If some of the provided values are invalid, an error message will indicate a failure to connect.
Discover Resources
OptScale needs to have permissions configured in AWS for the user Data Source in order to correctly discover resources and display them under a respective section of the dashboard for the associated employee.
Make sure to include the following policy in order for OptScale to be able to parse EC2 resources data:
{
"Version": "2012-10-17",
"Statement": [
{
"Sid": "OptScaleOperations",
"Effect": "Allow",
"Action": [
"s3:GetBucketPublicAccessBlock",
"s3:GetBucketPolicyStatus",
"s3:GetBucketTagging",
"iam:GetAccessKeyLastUsed",
"cloudwatch:GetMetricStatistics",
"s3:GetBucketAcl",
"ec2:Describe*",
"s3:ListAllMyBuckets",
"iam:ListUsers",
"s3:GetBucketLocation",
"iam:GetLoginProfile",
"cur:DescribeReportDefinitions",
"iam:ListAccessKeys"
],
"Resource": "*"
}
]
}
Your AWS Data Source should now be ready for integration with OptScale! Please contact our Support Team at support@hystax.com if you have any questions regarding the described configuration flow.
Migrating from CUR to CUR 2.0
The information on this page can be useful if an AWS Data Source (Legacy CUR export schema) has already been connected and you want to configure CUR 2.0 data and update the AWS Data Source.
A new bucket is required
Create a new Data Export with CUR 2.0 schema. Navigate to AWS Billing & Cost Management → Data Exports page.
Step 1. Export type
- Select Standard data export export type.
Step 2. Export name
- Input export name. The content of the Export name field will be required when updating an AWS Data Source in OptScale.

Step 3. Data table content settings:
- Select CUR 2.0.
- Select Include resource IDs checkbox.
- Choose the time granularity for how you want the line items in the export to be aggregated.

Step 4. Data export delivery options:
- Pick Overwrite existing data export file.
- Select compression type.
Step 5. Data export storage setting
- Configure a new bucket. The content of the S3 path prefix and S3 bucket name fields will be required when updating an AWS Data Source in OptScale.

Step 6. Review
- Confirm export creation. Data Export will be prepared by AWS during 24 hours.
Click on the existing AWS Data Source on the Data Source page. The page with detailed information opens. Click the UPDATE CREDENTIALS button to update the Data Source credentials. Switch on Update Data Export parameters to update info about the billing bucket.

Select Standard data export (CUR 2.0) export type. Enter Export name from the first step as Export name, S3 bucket name as Export Amazon S3 bucket name, and S3 bucket name as Export path prefix.
Save and wait for a new export to import!
The bucket already exists
Use this case if you have already connected an AWS Data Source (on Legacy CUR export schema) and want to configure CUR 2.0 data into the same bucket.
Create a new Data Export with CUR 2.0 schema. Navigate to AWS Billing & Cost Management → Data Exports page.
Step 1. Export type
- Select Standard data export export type.
Step 2. Export name
- Input export name. The content of the Export name field will be required when updating an AWS Data Source in OptScale.

Step 3. Data table content settings:
- Select CUR 2.0.
- Select Include resource IDs checkbox.
- Choose the time granularity for how you want the line items in the export to be aggregated.

Step 4. Data export delivery options:
- Pick Overwrite existing data export file.
- Select compression type.
Step 5: Data export storage setting:
Click on the existing AWS Data Source on the Data Source page. The page with detailed information opens.
Click the UPDATE CREDENTIALS button to update the Data Source credentials. Switch on Update Data Export parameters to update info about the billing bucket.

Select Standard data export (CUR 2.0) export type and update Export name and Export path prefix fields, save and wait for a new export to import!
Azure
Subscription
To track a new Azure Data Source in your OptScale account, please select the Azure Subscription tab at the Data Source Connection step during the initial configuration or later on in the Settings section of the main page.

Name
In the first field, you can specify any preferred name to be assigned to this Data Source in OptScale.
Subscription ID
The Subscription ID is a unique string that identifies your Azure subscription. To find it:
- Log in to the Microsoft Azure Portal.
- Search for Subscriptions to access a list of all subscriptions associated with your Azure account. The list will include a subscription ID for each one.
When OptScale is programmatically signing in to Azure, it needs to pass a tenant ID and a application ID along with a secret, which is an authentication key.
Application (client) ID
Application (client) ID has to be generated manually in Azure to allow API communication with OptScale:
- Access the Azure Active Directory and navigate to App registrations
- CLick on + New registration and provide a name, e.g. OptScale, and then Register at the bottom of the page
- A new Application ID will become available (as in the screenshot below)

Attention
Once you have registered an Application, it is essential to explicitly grant it permissions in a form of a Role assignment to work with the current Azure subscription.
To perform a Role assignment, from the Azure home page navigate to Subscriptions and select the one you have provisioned to be linked to OptScale.
After being redirected to its dashboard, click Access control (IAM) in the left navigation bar and then go the Role assignments tab and click +Add, Add role assignment.

You will be prompted to input the Role, which has to be Reader, in the first field. The second one can be left unchanged. The third field should contain the name of a registered application from the previous steps, e.g. OptScale. Click Save to add the role assignment.

Directory (tenant) ID
Directory (tenant) ID is a globally unique identifier (GUID) that is different from your organization name or domain. Its value is easily accessible in the overview of the application that has been added in the previous steps via App registrations.
Go to Home → App registrations → e.g. OptScale → Overview → Directory (tenant) ID

Secret
Secret should be created within the newly registered application:
- Go to the App registrations, click on your application, e.g. OptScale
- Select Certificates & Secrets in the left navigation bar and add a + New client secret
Attention
Secret’s value will be hidden shortly after its creation. Make sure to copy it in a safe place.

Once the required fields are filled out, you can click Connect to validate the information. Once you have connected to the account, the data will be pulled from the source shortly afterwards and become available in the UI.
Your Azure Data Source account should now be ready for integration with OptScale! Please contact our Support Team at support@hystax.com if you have any questions regarding the described configuration flow.
Tenant
To track a new Azure tenant Data Source in your OptScale account, please select the Azure tenant tab at the Data Source Connection step during the initial configuration or later on in the Settings section of the main page.

Name
In the first field, you can specify any preferred name to be assigned to this Data Source in OptScale.
Application (client) ID
Application (client) ID has to be generated manually in Azure to allow API communication with OptScale:
- Access the Azure Active Directory and navigate to App registrations
- CLick on + New registration and provide a name, e.g. OptScale, and then Register at the bottom of the page
- A new Application ID will become available (as in the screenshot below)

Attention
Once you have registered an Application, it is essential to explicitly grant it permissions in a form of a Role assignment to work with the current Azure subscription.
To perform a role assignment, from the Azure home page navigate to Subscriptions and select the ones you have provisioned to be linked to OptScale.
After being redirected to its dashboard, click Access control (IAM) in the left navigation bar and then go the Role assignments tab and click +Add, Add role assignment.

You will be prompted to input the Role, which has to be Reader, in the first field. The second one can be left unchanged. The third field should contain the name of a registered application from the previous steps, e.g. OptScale. Click Save to add the role assignment.

Directory (tenant) ID
Directory (tenant) ID is a globally unique identifier (GUID) that is different from your organization name or domain. Its value is easily accessible in the overview of the application that has been added in the previous steps via App registrations.
Go to Home → App registrations → e.g. OptScale → Overview → Directory (tenant) ID

Secret
Secret should be created within the newly registered application:
- Go to the App registrations, click on your application, e.g. OptScale
- Select Certificates & Secrets in the left navigation bar and add a + New client secret
Attention
Secret’s value will be hidden shortly after its creation. Make sure to copy it in a safe place.

Once the required fields are filled out, you can click Connect to validate the information. Once you have connected to the account, the data will be pulled from the source shortly afterwards and become available in the UI.
GCP
Google Cloud
Enable Billing export
Please follow the official GCP guide to enable billing data export – Set up Cloud Billing data export to BigQuery | Google Cloud.
As the result you should have a new table in your BigQuery project. Note the names of the dataset and the table. You will need them later when connecting your cloud account to OptScale.

Prepare a role for OptScale
With a CLI command
Run the following command in GCP CLI:
gcloud iam roles create
optscale_connection_role \--project=hystaxcom
\--permissions=bigquery.jobs.create, bigquery.tables.getData, compute.addresses.list,
compute.addresses.setLabels, compute.disks.list, compute.disks.setLabels, compute.firewalls.list,
compute.globalAddresses.list, compute.instances.list, compute.instances.setLabels, compute.images.list,
compute.images.setLabels, compute.machineTypes.get, compute.machineTypes.list, compute.networks.list,
compute.regions.list, compute.snapshots.list, compute.snapshots.setLabels, compute.zones.list,
iam.serviceAccounts.list, monitoring.timeSeries.list, storage.buckets.get, storage.buckets.getIamPolicy,
storage.buckets.list, storage.buckets.update
Via Google Cloud console
1. Go to Roles page and click Create Role.
2. Give the role any name and description.
3. Add the following permissions:
- bigquery.jobs.create
- bigquery.tables.getData
- compute.addresses.list
- compute.addresses.setLabels
- compute.disks.list
- compute.disks.setLabels
- compute.firewalls.list
- compute.globalAddresses.list
- compute.instances.list
- compute.instances.setLabels
- compute.images.list
- compute.images.setLabels
- compute.machineTypes.get
- compute.machineTypes.list
- compute.networks.list
- compute.regions.list
- compute.snapshots.list
- compute.snapshots.setLabels
- compute.zones.list
- iam.serviceAccounts.list
- monitoring.timeSeries.list
- storage.buckets.get
- storage.buckets.getIamPolicy
- storage.buckets.list
- storage.buckets.update
Create service account
Official documentation on service accounts – Service accounts | IAM Documentation | Google Cloud.
- Go to Service accounts page and click Create Service Account
- Give it any name and click Create and Continue.
- Specify the role that you created earlier and click Continue and then Done
Generate API key for your service account
- Find your service account in the service accounts list and click on its name to go to service account details page.
- Go to Keys tab.
- Click Add key -> Create new key
- Service account API key will be downloaded as a .json file. You will need this file on the next stage when connecting your cloud account to OptScale.
Connect Data Source in OptScale
Use the newly downloaded service account credentials json file with the billing dataset details to connect your GCP cloud account.

Google Cloud tenant
Prepare a role for OptScale
With a CLI command
Run the following command in GCP CLI:
gcloud iam roles create
optscale_connection_role \--project=hystaxcom
\--permissions=bigquery.jobs.create, bigquery.tables.getData, compute.addresses.list,
compute.addresses.setLabels, compute.disks.list, compute.disks.setLabels, compute.firewalls.list,
compute.globalAddresses.list, compute.instances.list, compute.instances.setLabels, compute.images.list,
compute.images.setLabels, compute.machineTypes.get, compute.machineTypes.list, compute.networks.list,
compute.regions.list, compute.snapshots.list, compute.snapshots.setLabels, compute.zones.list,
iam.serviceAccounts.list, monitoring.timeSeries.list, storage.buckets.get, storage.buckets.getIamPolicy,
storage.buckets.list, storage.buckets.update
Via Google Cloud console
1. Go to Roles page and click Create Role.
2. Give the role any name and description.
3. Add the following permissions:
- bigquery.jobs.create
- bigquery.tables.getData
- compute.addresses.list
- compute.addresses.setLabels
- compute.disks.list
- compute.disks.setLabels
- compute.firewalls.list
- compute.globalAddresses.list
- compute.instances.list
- compute.instances.setLabels
- compute.images.list
- compute.images.setLabels
- compute.machineTypes.get
- compute.machineTypes.list
- compute.networks.list
- compute.regions.list
- compute.snapshots.list
- compute.snapshots.setLabels
- compute.zones.list
- iam.serviceAccounts.list
- monitoring.timeSeries.list
- storage.buckets.get
- storage.buckets.getIamPolicy
- storage.buckets.list
- storage.buckets.update
Create service account
Official documentation on service accounts – Service accounts | IAM Documentation | Google Cloud.
Go to Service accounts page and click Create Service Account.
Give it any name and click Create and Continue.
Specify the role that you created earlier and click Continue and then Done.
Grant access
For each project that needs to be added to the tenant, go to the IAM & Admin section in the Google Cloud Console, select IAM, and press the GRANT ACCESS button. Add the created service account and assign the created role to it.
Generate API key for your service account
Find your service account in the service accounts list and click on its name to go to service account details page.
Go to Keys tab.
Click Add key -> Create new key.
Service account API key will be downloaded as a .json file. You will need this file on the next stage when connecting your cloud account to OptScale.
Connect a Data Source in OptScale
To track a new Google Cloud tenant Data Source in your OptScale account, please select the Google Cloud tenant tab at the Data Source Connection step during the initial configuration or later on in the Settings section of the main page.

Kubernetes
To track a new Kubernetes cluster Data Source in your OptScale account, please select the Kubernetes tab on the Data Source Connection page.

Use Connect to create a Data Source in OptScale.
Click on the newly created Data Source on the Data Sources page. The page with detailed information appears.

Use KUBERNETES INTEGRATION or instructions to get the instructions to install the software that collects information about running pods and converts them into cost metrics.

Software installation on a cluster
To get cost metrics download and install helm chart on the Kubernetes cluster. Helm chart is created to collect Kubernetes resources information and share it with OptScale FinOps project. Install one release per cluster.
1. Download Hystax repo
Use this command to download repo:
helm repo add hystax https://hystax.github.io/helm-charts
2. Install Helm Chart
There is a difference in instructions when a Kubernetes Data Source is connected on my.optscale.com or on OptScale deployed from open source. In both cases, instructions given are adapted for a selected Data Source and deployed OptScale. All you need is just to copy-paste it and replace the <password_specified_during_data_source_connection> phrase with a user’s password.
My.optscale.com


Note
Specify the user’s password instead of the <password_specified_during_data_source_connection> phrase.
Warning
Please await the completion of the metric generation process, which typically requires approximately one hour.
Open Source OptScale

